How to install and start using FFMpeg in under 10 minutes
Published on May 17, 2023
Last updated on September 17, 2024
9 min read
If you work with video, audio, or any other type of multimedia files on a regular basis, you may have heard of FFmpeg(opens in a new tab). This Swiss Army knife of a software project is one of the most versatile file editing tools in existence. Anything you can do with your editing GUI can almost certainly be done with FFmpeg as well, and with more flexibility and control to boot. So if you’re in the editing space in any capacity, familiarizing yourself with FFmpeg is an investment that will pay dividends in the form of video editing edge cases placed comfortably within your reach.
Okay, enough gushing about FFmpeg. For all its awesomeness, it does have a few drawbacks. For one, its documentation(opens in a new tab), while incredibly thorough, is not the most user-friendly resource out there. Additionally, FFmpeg is a command-line tool, not a nice slick GUI. This means getting started comes with a substantial barrier to entry, so much so that the installation process alone might be enough to extinguish the flame of your curiosity.
But fear not! This doesn’t have to be the case. We’ve assembled this guide to get you over the hump with FFmpeg. By the time you finish following along with this article, you’ll have installed FFmpeg on your platform of choice in under 10 minutes. You’ll also have enough comfort with the basic structure an FFmpeg command that you should be able to accomplish a good variety of basic use vases. In other words, this tortuous maze of documentation(opens in a new tab) will soon become the nimble dagger you use to trim, slice, and convert to your heart’s content.
Let’s get started!
Installing FFmpeg on Windows
Step 1: Download an FFmpeg build
To download FFmpeg on Windows, visit the FFmpeg download page(opens in a new tab), and hover over the Windows icon on the homepage. This will display links to two separate pages where you can download the FFmpeg packages. Click on the top link, Windows builds from gyan.dev(opens in a new tab):

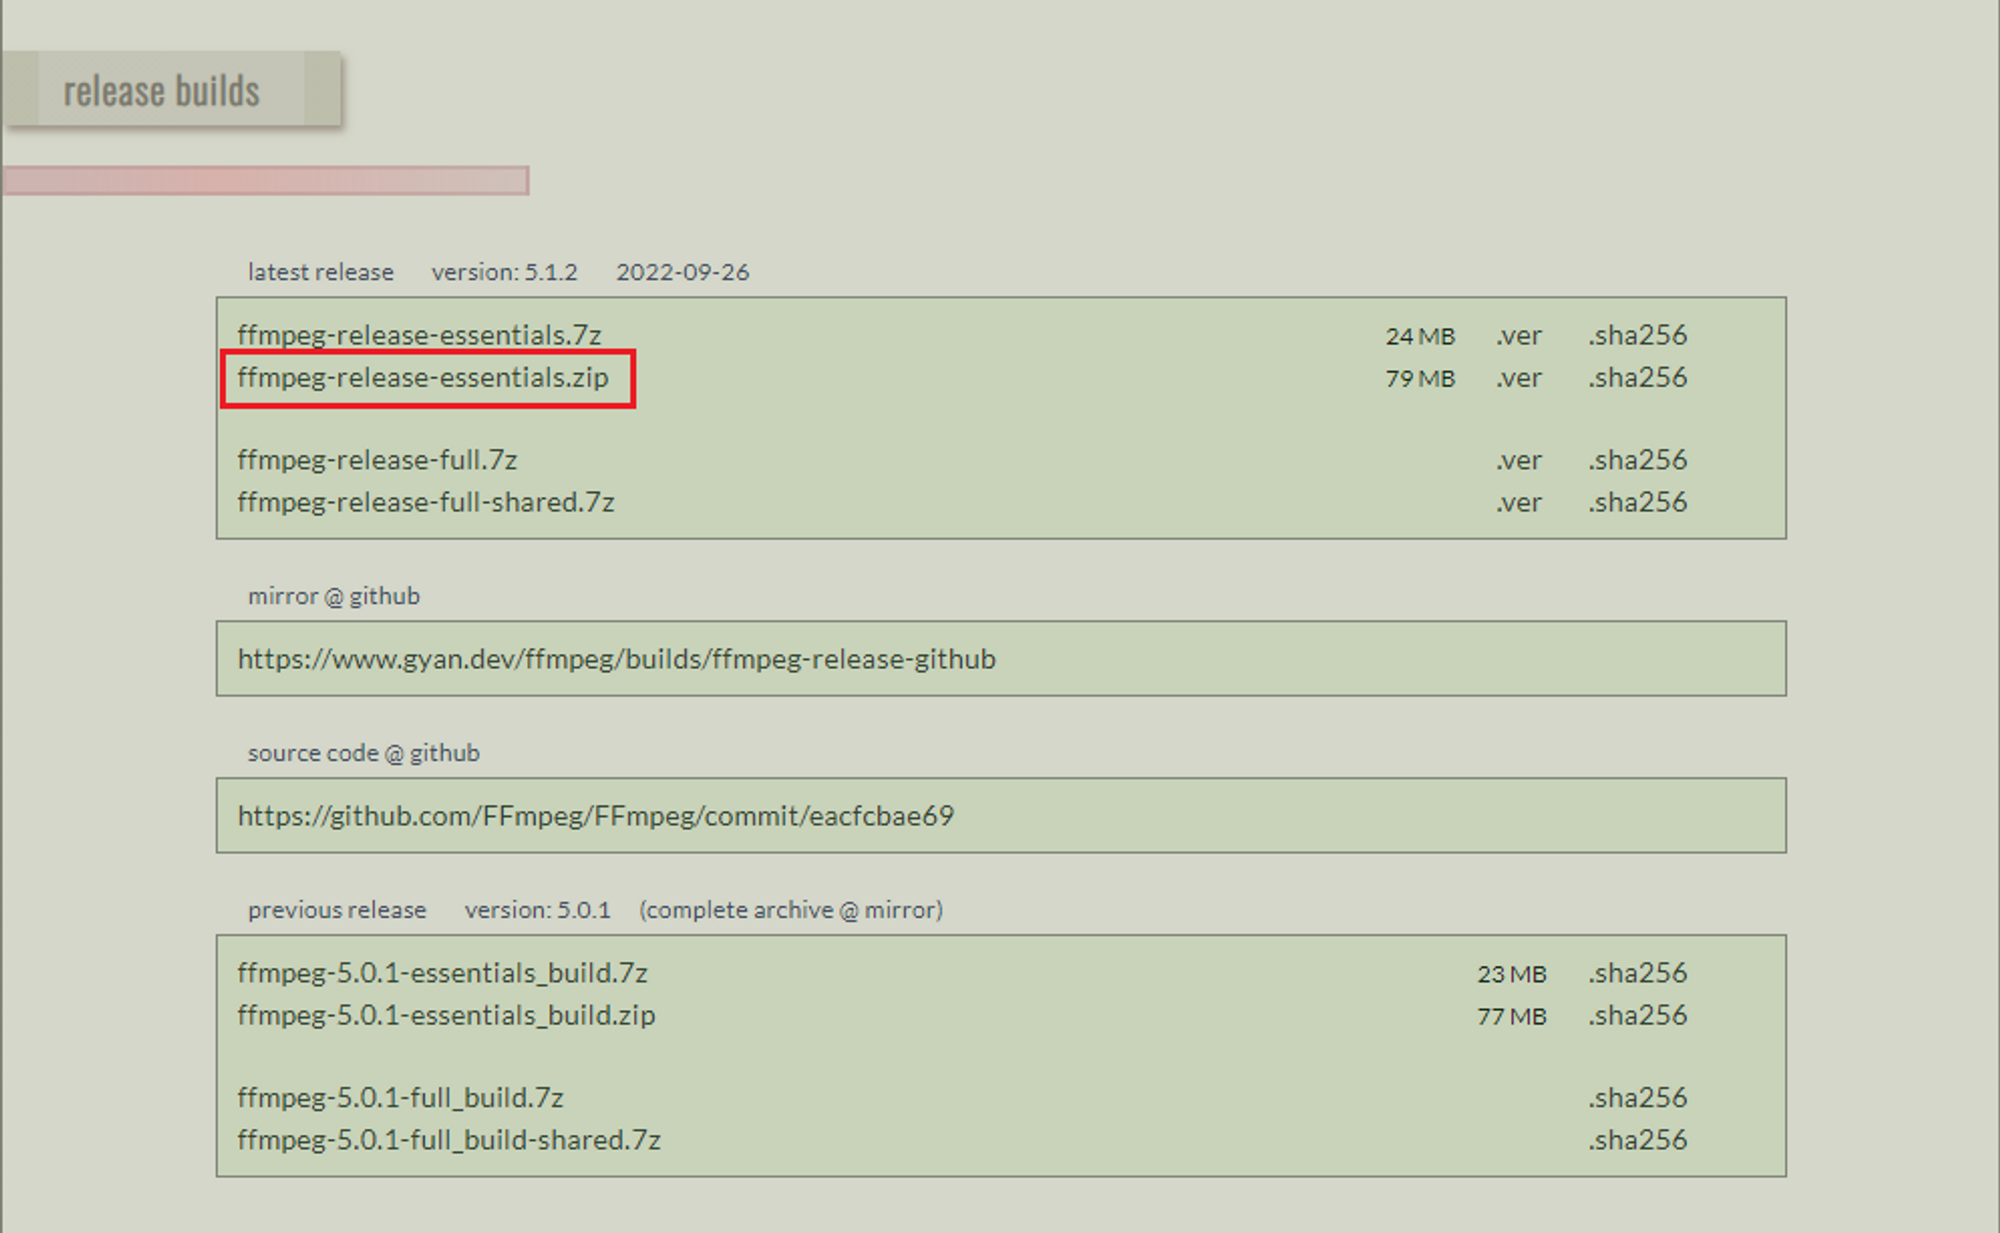
On the FFmpeg builds page(opens in a new tab) on gyan.dev, you’ll see both git master builds and release builds. Scrolling down, you’ll see a section for tools to download, some information about the resources on this page, and a list of the libraries supported in each of the builds. GIt Master builds are published more frequently and often include more recent features than the release builds. Release builds are more stable, however, so in most cases it will make sense to download one of these.
Double-click the .zip file highlighted here:
Step 2: Create a folder where your FFmpeg files will live
house your files in a folder on your computer that you won’t accidentally move or delete. Open File Explorer, then complete the following steps:
- Create a new folder on your main storage drive called
ffmpeg. - Open the main FFmpeg build folder in /Downloads (or wherever else your browser saved these files).
- Open the
binfolder, and copy the three files it contains. - Paste these three files in your new
ffmpegfolder.
Nice! You now have the FFmpeg packages stored on your computer. Now you have to tell Windows where to find these files when you run the ffmpeg command in your terminal. The way you’ll do this is by creating a Windows PATH environment variable, which will point to the folder in your operating system that contains the FFmpeg files.
Step 3: Create a PATH environment variable for your FFmpeg files
The last step in this process is to tell Windows where to find these files when you run the ffmpeg command in your terminal by creating a Windows PATH environment variable. To do that:
- Search “Advanced system settings” in the Windows search bar.
- Click the “Environment Variables” button.
- Select “Path” from the list of system variables and click “Edit.”
- Click “New” and add the path to your
ffmpegfolder, then click “OK.”
Step 4: Verify that FFmpeg has been installed
You’re almost there! The last think you need to do is verify the installation. To do this, run the following command in a terminal window: ffmpeg -version. If FFmpeg has been installed properly, this command will return the version that you have installed, along with information about the build configuration:
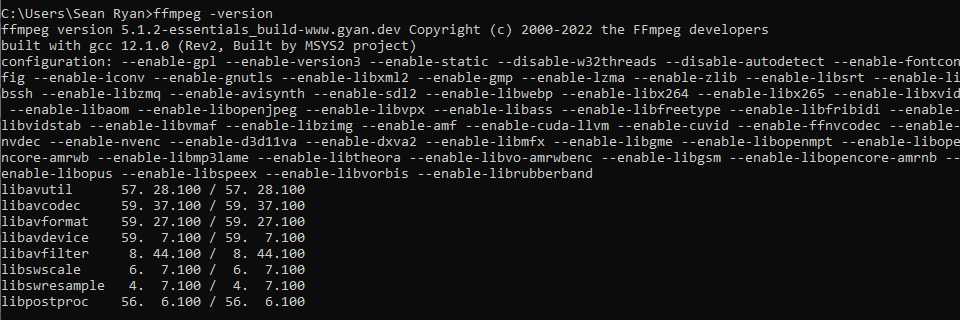
That's it! You have now installed FFmpeg on your Windows machine and can use it to convert and manipulate audio and video files.
Installing FFmpeg on MacOS
The easiest way to install FFmpeg on MacOS is to use Homebrew(opens in a new tab), which is a package manager for macOS that makes it easy to install and manage software. While it is possible to install FFmpeg on MacOS without Homebrew, this is a cumbersome process and is not recommended.
Step 1: Make sure Homebrew is installed
If you don't already have Homebrew installed on your machine, you can install it by running the following command in a terminal window:
/bin/bash -c "$(curl -fsSL https://raw.githubusercontent.com/Homebrew/install/HEAD/install.sh)"Step 2: Install FFmpeg with Homebrew
Run the command brew install ffmpeg in your terminal. This will download and install the latest version of FFmpeg, along with any dependencies it requires.
Step 3: Verify the installation
Homebrew installs the FFmpeg packages in usr/local/bin, which automatically places it within your system’s $PATH. This means you don’t have to do any work to make sure your terminal know what you’re talking about when you run ffmpeg. To verify that FFmpeg has been installed successfully, run ffmpeg -version in your terminal:
This will display the version of FFmpeg that you have installed, along with information about the build configuration. That's it! You have now installed FFmpeg on your macOS machine, and you can begin using it to slice, dice, and otherwise manipulate video and audio files.
Common FFmpeg use cases
Now that you have FFmpeg installed on your system of choice, the video editing world is your oyster. There is no end to the fun you can have or the things you can accomplish with this incredible tool at your disposal.
Here are just a few of the most common video editing use cases for FFmpeg:
- Converting video files without re-encoding : You can easily use FFmpeg to create a copy of a video file in another format without re-encoding the original file. For example, creating an mp4 from an mkv file (while leaving the original mkv file intact) is as simple as writing:
ffmpeg -i input_file.mkv -c:v copy -c:a copy output.mp4 - Cutting videos: FFmpeg provides several different methods of cutting and saving desired segments of a video. Here’s how you’d cut a segment out of a video beginning at 3:25 and ending at 9:45, and save this segment as a separate file called output.mp4:
ffmpeg -i input.mp4 -ss 00:03:25 -to 00:9:45 -c:v copy -c:a copy output.mp4 - Cropping videos: FFmpeg provides great flexibility when it comes to cropping videos. Here’s how you would crop a section of a video with a height of 550 pixels, a width of 400 pixels, from a position starting 700 pixels off the X and Y axis:
ffmpeg -i input.mp4 -vf "crop=550:400:700:700" output.mp4
These are just three simple (but handy!) examples of video manipulation tasks you can accomplish using FFmpeg. Now let’s get our hands dirty running some commands against an actual video file to see this awesome tool in action.
Basic FFmpeg tutorial: Merge two videos together
To help solidify some of the basic concepts of FFmpeg, let’s walk through a simple use case. In this brief example, we’ll look at how to merge two videos together. Also called concatenation, combining multiple videos into a single file is a useful skill to have in your video editing toolkit.
Let’s get started!
Step 1: Download video assets
Download the two free video files below provided by pexels.com(opens in a new tab), and save them with the file names indicated in the link:
Step 2: Merge your video files with FFMpeg
Primary Method: Using the concat demuxer
Another way of concatenating videos with FFmpeg is to create a text file that includes the file paths of the videos you want to concatenate.
Step 1: Create a text file containing file paths to the videos you want to merge
You can do this within your operating systems interface, or programmatically like this:
(echo file 'video1.mp4' & echo file 'video2.mp4')>video_files.txtRunning the command above (on a Windows systems) will generate a text file called video_files.txt with the following contents:
file 'video1.mp4'
file 'video2.mp4'
Note: This file will be generated in the directory your terminal’s working directory at the time the command is run. The paths to the video files to concatenate should be relative to the directory that contains video_files.txt.
Step 2: Merge your video files with FFMpeg concat protocol
Now, run the following FFmpeg command:
ffmpeg -f concat -safe 0 -i video_files.txt -c copy combined_video.mp4Alternative method: Using the concat protocol
ffmpeg -i "concat:video1.mp4|video2.mp4" -c copy combined_video.mp4This command will generate a new video with the file name combined_video.mp4. Let’s break down what this command is doing:
- Including
ffmpegat the beginning of the command is what points the terminal to our FFmpeg libraries, and gives us access to their functionality. - The
-iflag tells FFmpeg that the next part of the command will be the path to the input file. - In
"concat:video1.mp4|video2.mp4", we tell FFmpeg which functionality to use (concatenation), and which files to concatenate together. This command uses the concat protocol(opens in a new tab), which is one of two methods for combining videos using FFmpeg. (The concat demuxer(opens in a new tab) is the other). - The
-cflag specifies which codec should be used for the output file. copyis a value that is set for the codec option that tells FFmpeg that we want to create a new file rather than decoding, filtering, then reencoding the existing video files.
And that’s it! The combined video below will be the result of either of the two concatenation methods:
Taking your FFmpeg knowledge further
Is your interest piqued? It should be! Here are some other FFmpeg tutorials you can follow to get more experience using this amazing tool: